
External devices
General information
External audio and video devices and digital cameras can be connected to cinch sockets, on the CD/DVD player. Operation takes place on the external device.
Due to the large number of different audio and video devices available on the market, it cannot be ensured that every audio and video device will be displayed correctly on the screen.
Connecting an external device
1. Fold down the cover in front of the cinch
sockets on the CD/DVD player.
2. Connect the external device to the RCA
sockets.
▷ Video: yellow socket.
▷ Audio: white and red socket.
Starting playback
1. "CD/Multimedia"
2. "External devices"
3. Select the  or
or
 symbol
Volume
The volume of the sound output is dependent on the audio device. If this volume differs markedly from the volume of the other audio sources, it is advisable to adjust the volumes.
Adjusting the volume
The volume can only be adjusted if no external video device is connected.
1. "CD/Multimedia"
2. "External devices"
3. Select the  or
or
 symbol.
4. "Volume"
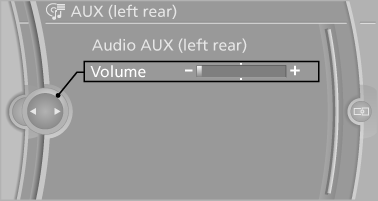
5. Turn the controller until the desired volume is set and press the controller.
What to do if...
Only a black screen is visible.
▷ Switch on the system.
There are no options available on the screen.
▷ Replace remote control batteries.
▷ With Professional rear seat entertainment
toggle between screens if necessary.
Radio stations or TV channels are grayed out
and cannot be selected.
▷ Function is limited due to the selected priority.
Change priority.
The DVD does not play.
▷ Playback does not begin automatically.
Start DVD manually
The volume of the rear vehicle speakers cannot
be adjusted.
▷ Sound in the rear is output via the headphones.
Change priority if necessary and
output sound via vehicle speakers.
See also:
Storage compartments
The following storage compartments are available
in the vehicle interior:
► Glove compartment on the front passenger
side.
► Storage compartment in the front center
armrest.
► ...
Remote control
In the center armrest in the rear
Storage is possible in a horizontal position in the
center armrest.
Menu navigation
The transmission time of the remote control is
limited by law. To execu ...
Switching on/off
Switching on/off
Press button 1 on the steering wheel.
▷ On: lane markings 2 are lit.
▷ Off: lane markings 2 go out.
The system can issue warnings at speeds above
approx. 40 mph/65 ...