Partition net
![]() Do not let the partition net snap back into
place
Do not let the partition net snap back into
place
Do not allow the partition net to snap back into
place; otherwise, there is a danger of injury and
the partition net could be damaged.◄
With a normal cargo area
1. Fold open the rear covers on the headliner.
2. Pull the partition net out of the case by the
strap.
3. Insert the bars into the brackets on both
sides in the headliner toward the front, arrow.
This is best performed from the rear seat.
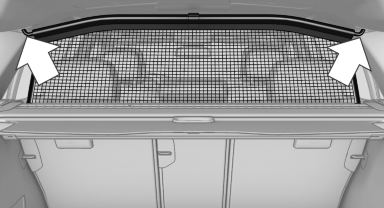
If the partition net is no longer needed: proceed in reverse order.
With an enlarged cargo area
1. Fold down the entire rear seat backrest.
2. Press the button, arrow 1, to unlock the case
on both sides.
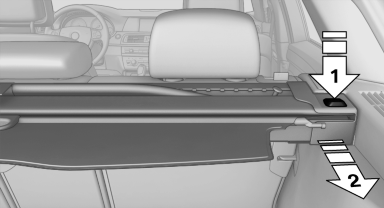
3. Pull the case rearward out of the two side
brackets, arrow 2. Make sure not to tilt it in
the process.
4. Slide the case all the way into the guides,
arrows 1, on the backs of the backrests.
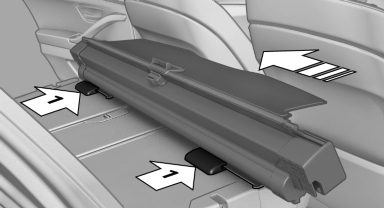
5. Fold open the front covers on the headliner.
6. Carefully pull out the partition net and insert
it into the brackets as in the normal cargo
area.
This is best performed from the front seat.
If the partition net is no longer needed: proceed in reverse order.
Finally, slide the case forward into the two brackets on the sides until it engages. The red warning fields disappear.
Tug on the case to check if it is properly locked in place.
See also:
Automatic deactivation during forward travel
The system switches off when a certain driving
distance or speed is exceeded.
Switch the system back on if necessary. ...
Wheels with electronics for TPM Tire
Pressure Monitor
When mounting new tires or changing from
summer to winter tires or vice versa, only use
wheels with TPM electronics; otherwise, the
Tire Pressure Monitor will not be able to detect
a flat tire ...
Opening the main menu
Press the button.
The main menu is displayed
The main menu is displayed.
All iDrive functions can be called up via the main
menu. ...